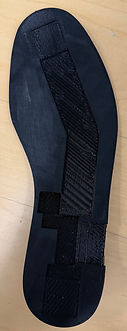
Insole Assembly
Take out all of the required materials in each box:
-
Hardware Assembly kit
-
3-D printed case (black)
-
Logic Unit
-
Foam sheet(s) (each group member can pick their size)
-
Tape
-
Tacky Glue
-
Scissors
-
Pen/pencil
To prepare the insole
1. Pick the insole size that best fits your shoe
2. Trim the foam sheet to match the insole outline.
3. Place the sensors onto the insole and secure them with tape.
4. Apply glue and press the trimmed foam onto the insole.
5. Let the glue dry before moving on.
On the server itself, certain text will appear in black. Students will need to click on that black text to see a picture of the process and how it is supposed to look like.
The next steps involve putting together the electronic components of the SonicSole together
1. Open the 3D printed case.
2. Connect the battery.
Wait 3 to 5 minutes for the board to boot up before continuing.
3. Place the PCB board back into the case.
4. Close the lid.
5. Plug in the insole.
To wear the insole
1. Put the insole into the shoe.
2. Attach the box to the shoe.
Once the devices are assembled students will run a sensor check on the insoles to make sure that it is ready to collect data.